You can now sync your outlook calendar with the Cita Calendar!
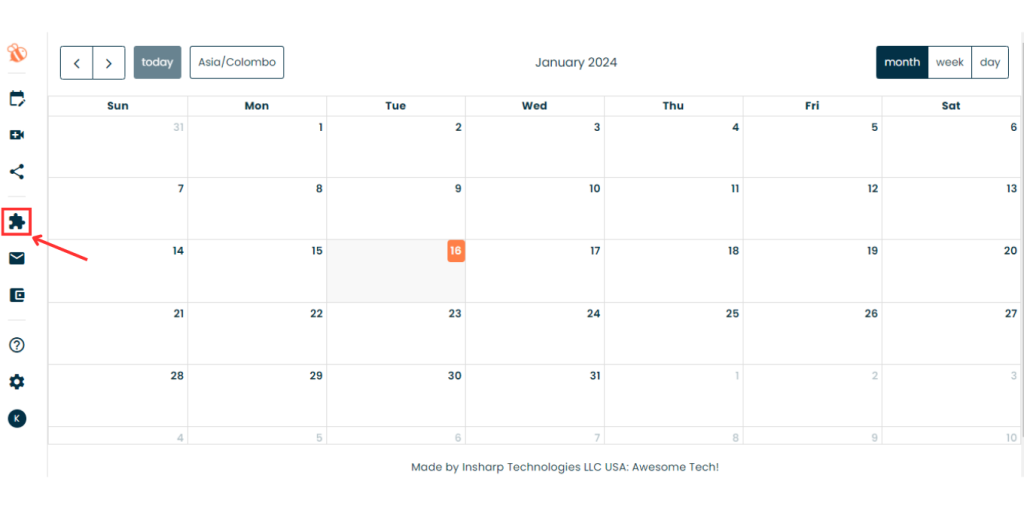
First go ahead and head over to the widgets store.
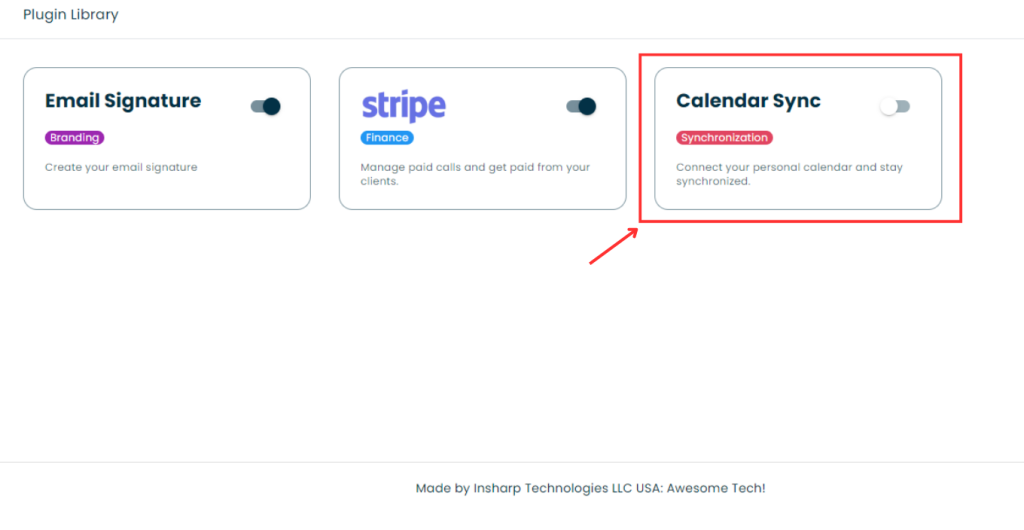
Next, head over and switch on the “Calendar Sync” Widget.
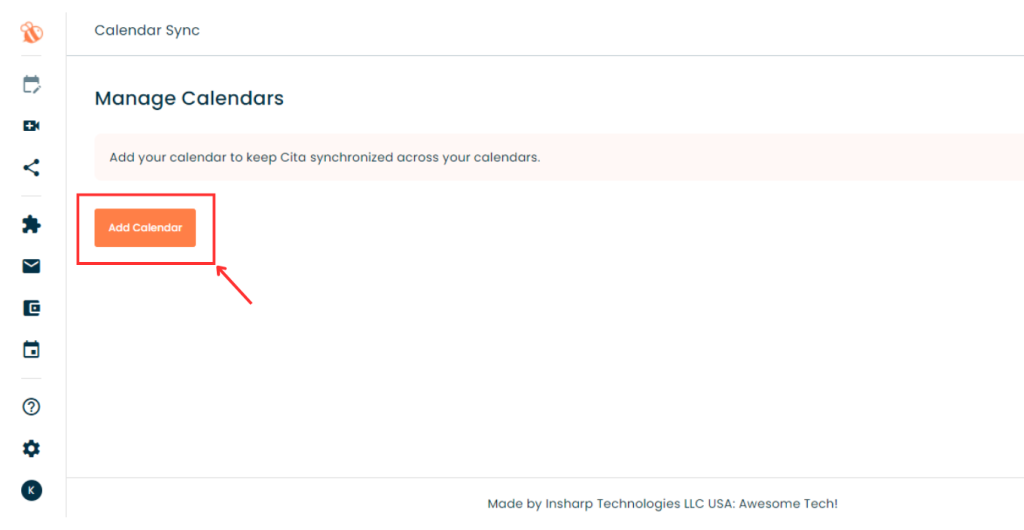
Next, click the “Add Calendar”
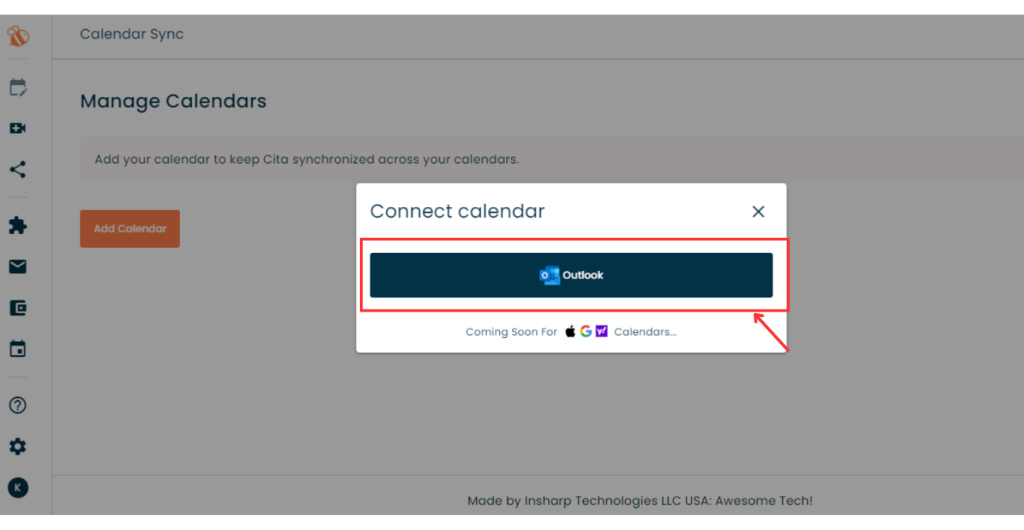
Then Select the preferred Calendar you would like to select.
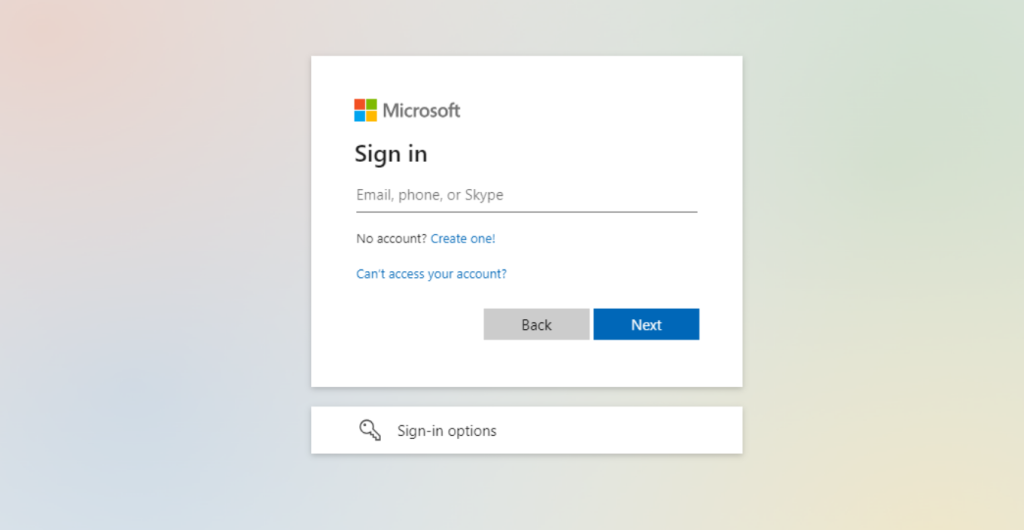
Next, Sign in to your account which is linked to your calendar.
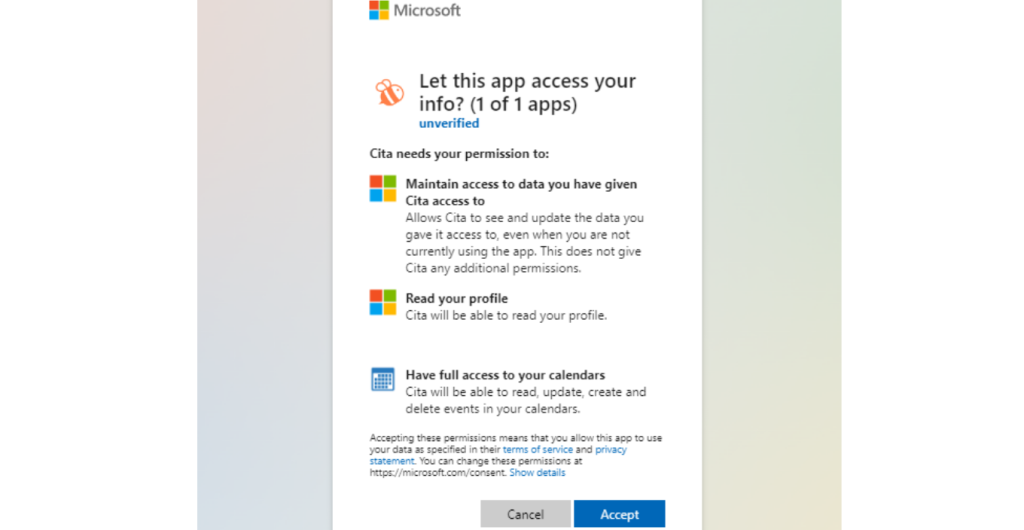
Allow the permissions that are being requested.
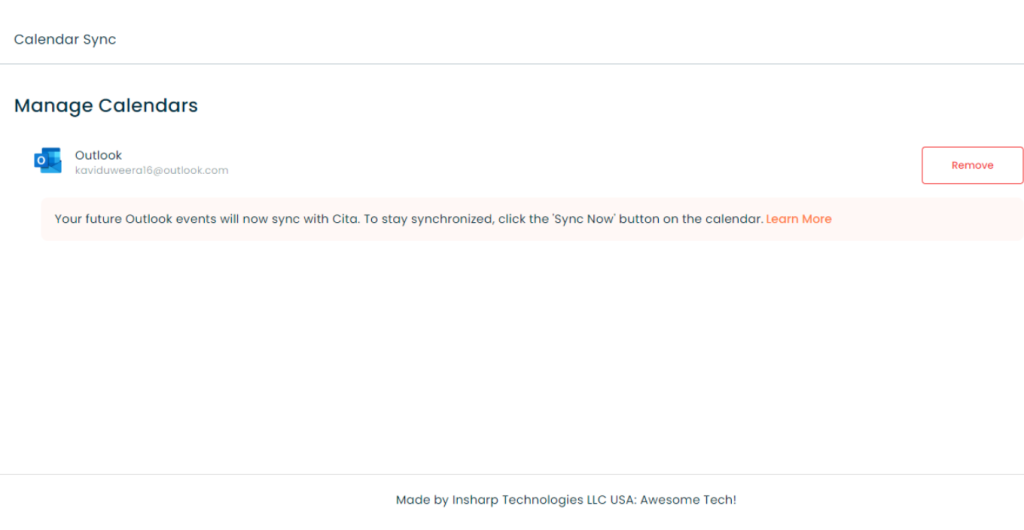
Great! Your account calendar has been successfully linked!
Make sure to click the “Last Synced” Button to view all your schedule.
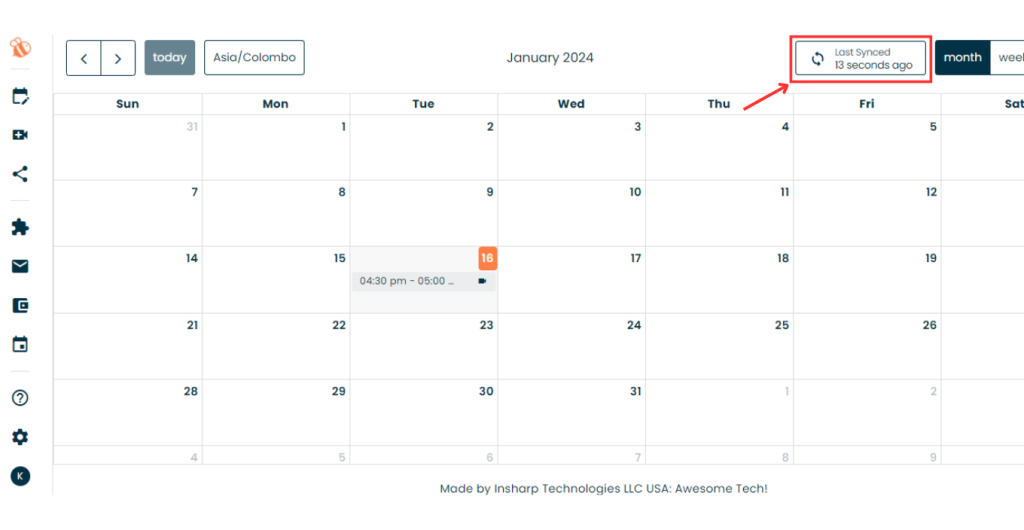
Congratulations your calendar is synced!
